Skip to content

Use code WELCOME30 to get 30% off your first purchase! Click here and fill in your details to claim the discount. Use code WELCOME30 to get 30% off your first purchase! Click here and fill in your details to claim the discount. Use code WELCOME30 to get 30% off your first purchase! Click here and fill in your details to claim the discount. Use code WELCOME30 to get 30% off your first purchase! Click here and fill in your details to claim the discount. Use code WELCOME30 to get 30% off your first purchase! Click here and fill in your details to claim the discount. Use code WELCOME30 to get 30% off your first purchase! Click here and fill in your details to claim the discount. Use code WELCOME30 to get 30% off your first purchase! Click here and fill in your details to claim the discount. Use code WELCOME30 to get 30% off your first purchase! Click here and fill in your details to claim the discount. Use code WELCOME30 to get 30% off your first purchase! Click here and fill in your details to claim the discount.

  • User Account
  • Business
  • Features
  • Earn
  • Login
  • User Account
  • Business
  • Features
  • Earn
  • Login
  • Languages
    • EN Help
    • DE Hilfe
    • BA Pomoć
    • FR Aide
    • Sl Pomoč
  • Languages
    • EN Help
    • DE Hilfe
    • BA Pomoć
    • FR Aide
    • Sl Pomoč
Get Started

User Account

5
  • How to register
  • General settings
  • How to Set Up Password, 2FA, Phone Number, and Email for Account Security
  • How to add an additional user account for employees
  • How to edit permissions for accounts created for employees

Business Management

7
  • How to set up and use an e-Signature
  • How to Set Up e-Invoices
  • How to Set Up Email SMTP Settings
  • How to customize the appearance of invoices/estimates
  • How to set the tax rate
  • How to set up online payment
  • How to manage your business

App Features

9
  • Dashboard
  • Project Creation, Tracking, and Management
  • Creating and managing invoices
  • Creating and managing estimates
  • Managing accounts, vendors, expenses, and products
  • Managing customers/clients
  • How to create a recurring invoice
  • Managing business reports
  • Managing HR (Human Resources)

Subscription Management

1
  • How to manage subscriptions?

Earn with us

1
  • How to earn with us
View Categories
  • Home page
  • Knowledge Base
  • Business Management
  • How to set up and use an e-Signature

How to set up and use an e-Signature

1 minutes to read

Welcome to the guide for using the e-Signature system within the AdBooks application. This module allows your clients to sign your invoices and estimate invoices directly online, securely and in a legally relevant manner, without printing, scanning, or exchanging emails.
—

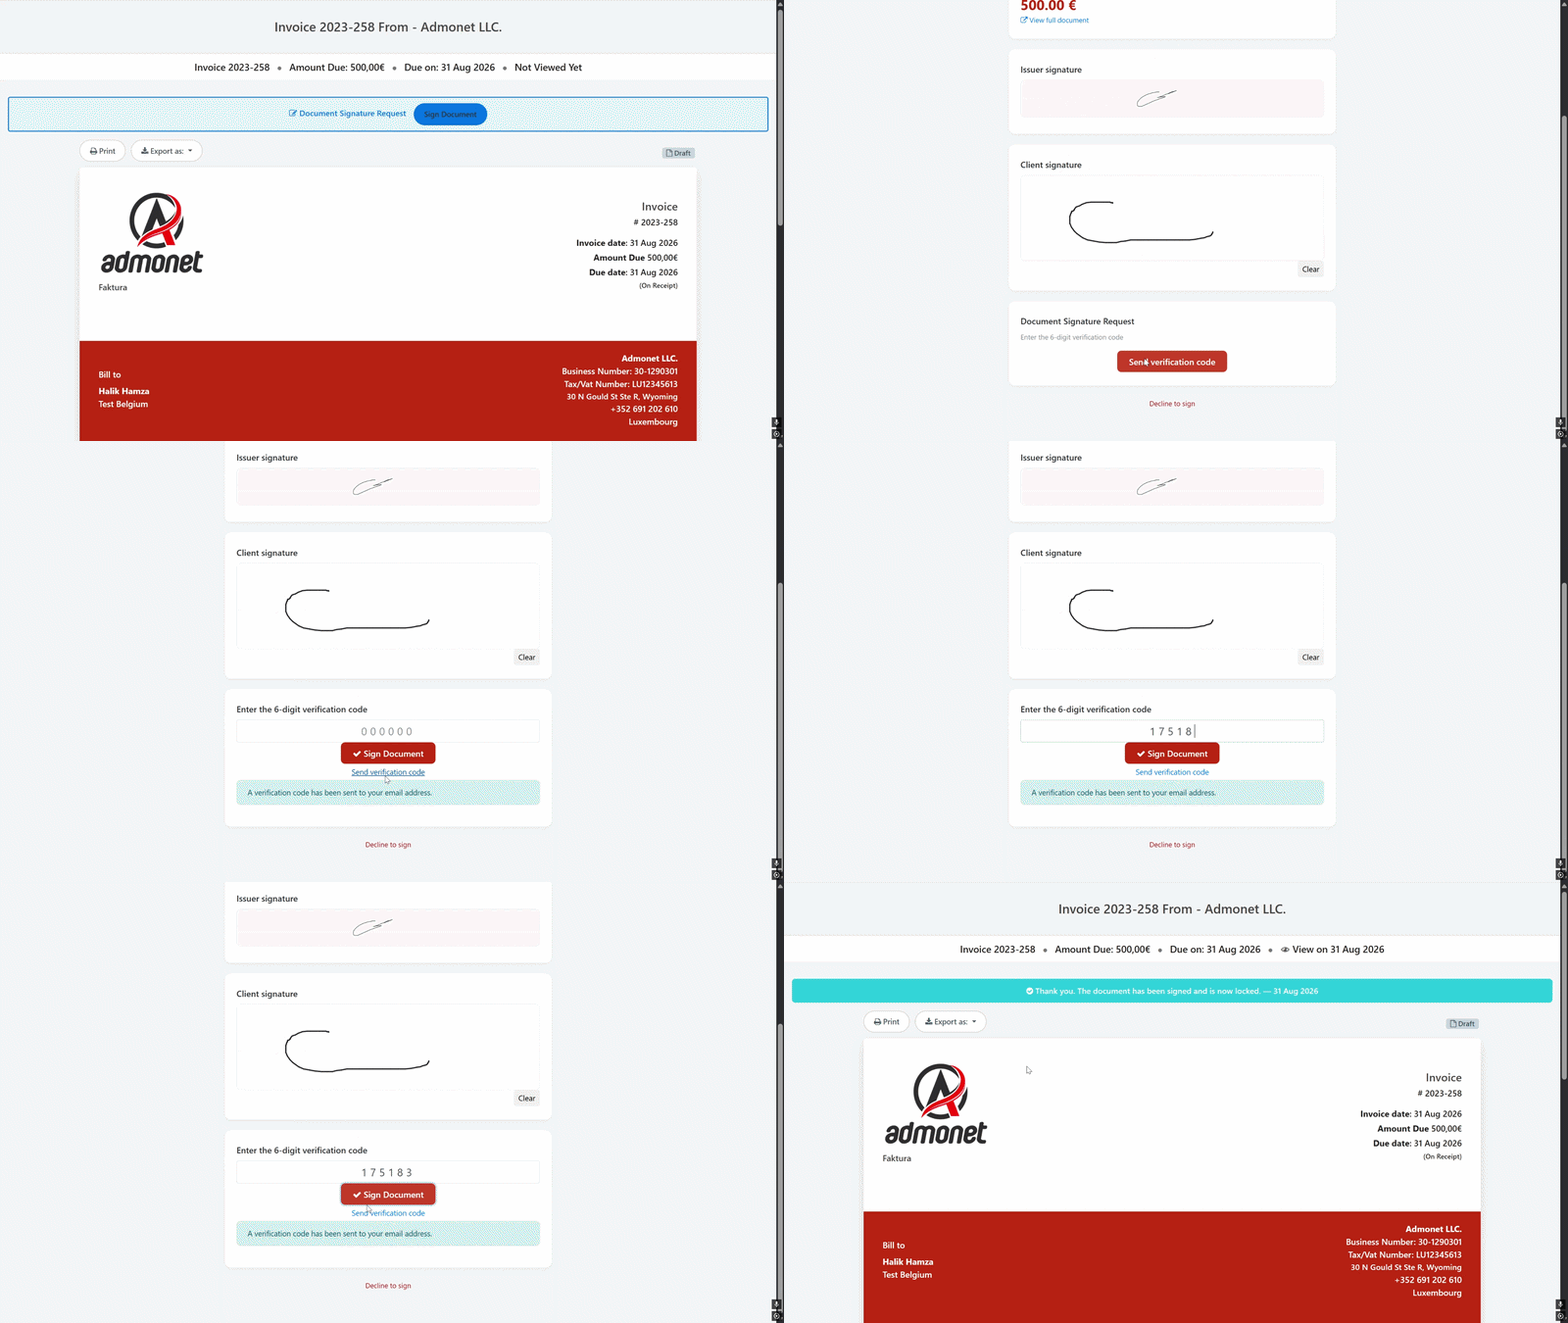
🚀 How to enable e-Signature on an invoice or estimate? The e-Signature is enabled individually, for each invoice or estimate invoice separately, at the time of creation or editing.

  1. Open the invoice/estimate creation or editing screen as usual.
  2. Find the option Enable e-signature and check it.
  3. Save the invoice/estimate as usual.

💡 Note: When the e-signature is enabled on a document, your client will see a signing button when opening the public link of the invoice/estimate.

—

📤 How does the client sign the document?
When you send the invoice/estimate to the client, the signing process looks like this:

  1. The client opens the invoice/estimate link – no account or password is required.
  2. The client reviews the document and clicks the signing button.
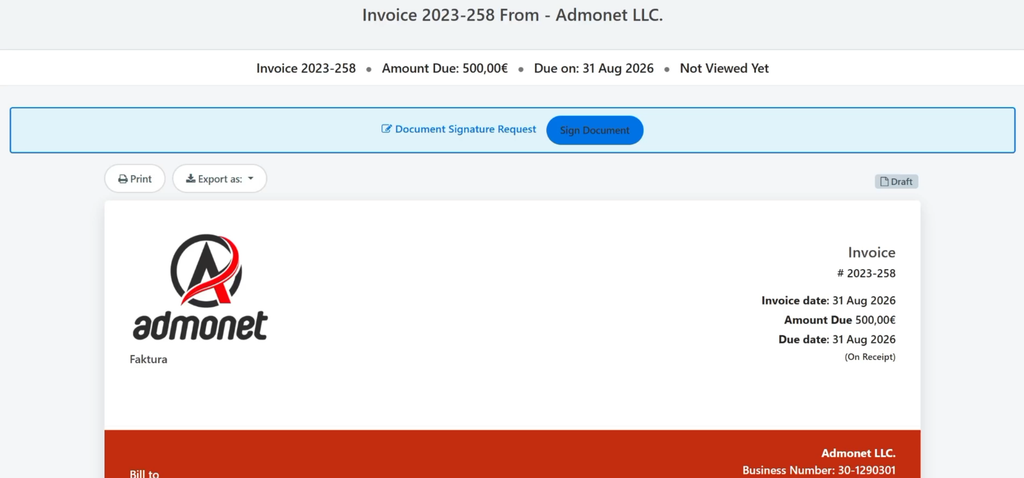
3. The system sends a one-time verification code (OTP) to the client’s email.
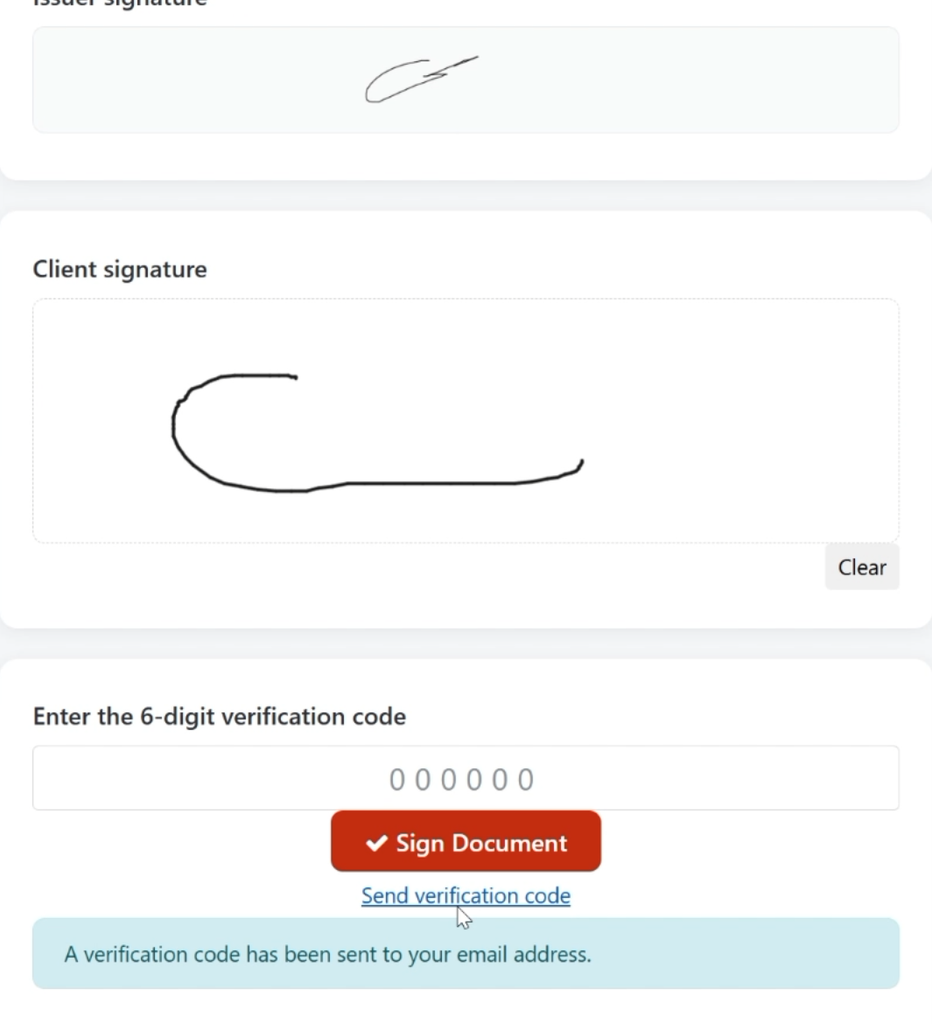
4. The client enters the code and then signs by hand – drawing their signature with a finger (on a phone/tablet) or a mouse (on a computer), directly on the screen.
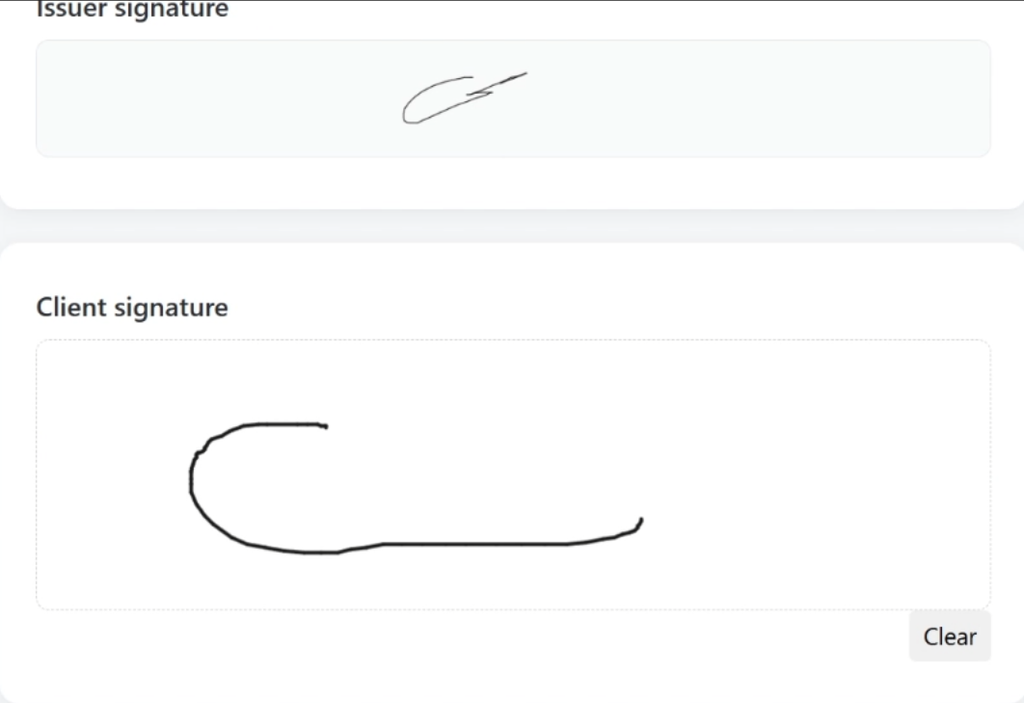
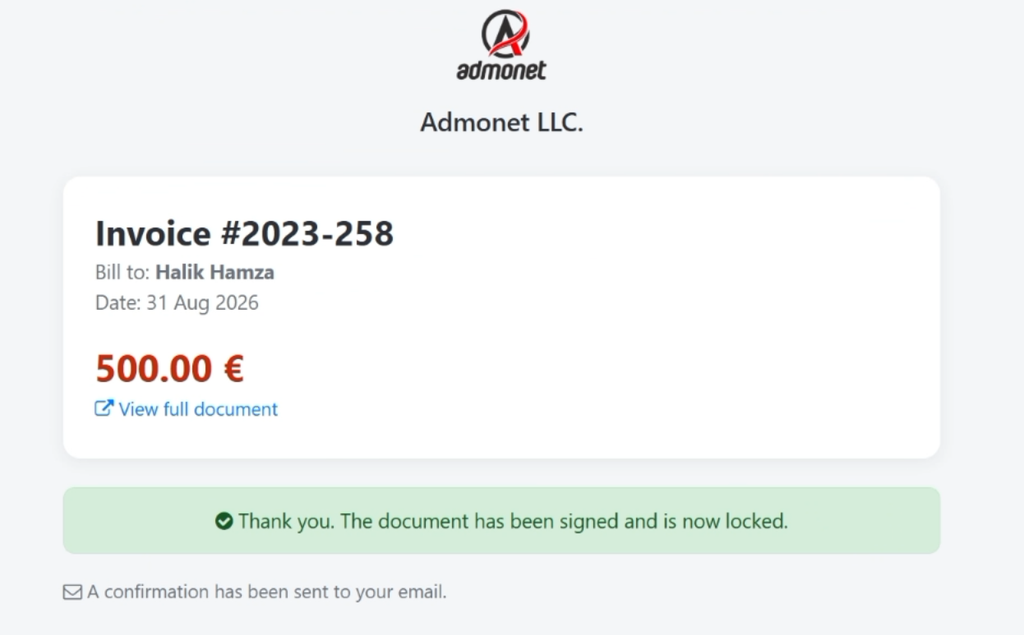
5. Upon signing, the document is immediately locked, and the client receives confirmation that the signature has been successfully recorded.
⚠️ The client can also refuse to sign at any time instead of signing – this action is also logged.

—

🔒 What happens after signing?

  • The invoice/estimate automatically gets the status Signed and a visual “Locked” label.
  • The document can no longer be edited, deleted, or converted – this protects both you and the client from subsequent changes after the signature has been given.
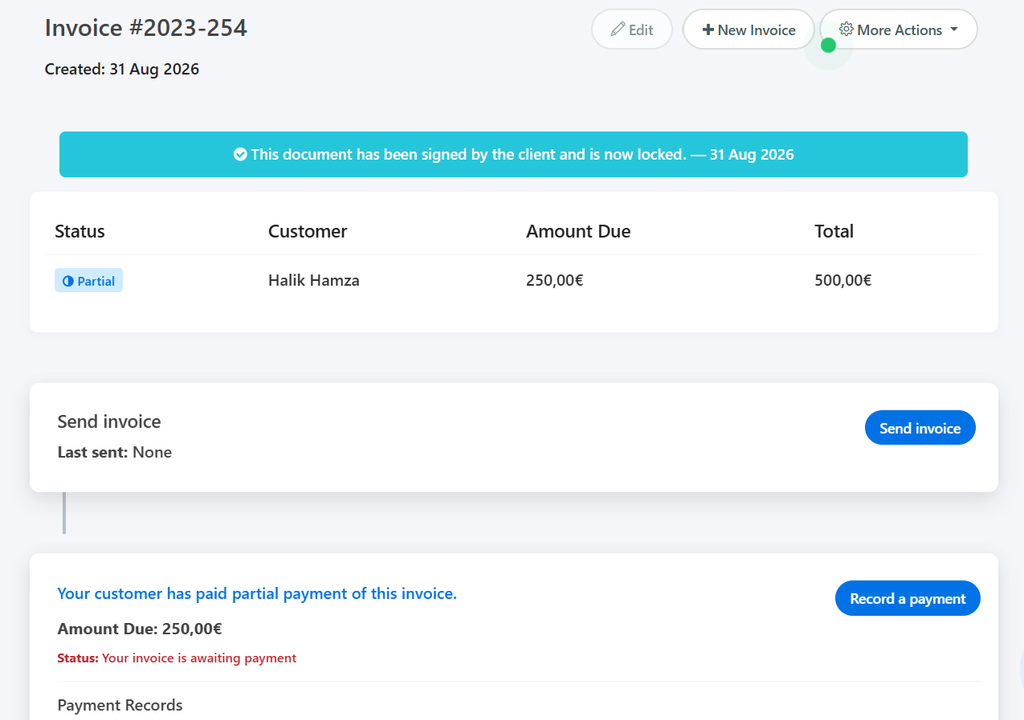
  • If the invoice was generated from a estimate as an advance or final invoice, a clear banner is displayed at the top of the document highlighting this.

—

📜 Audit Trail – complete transparency

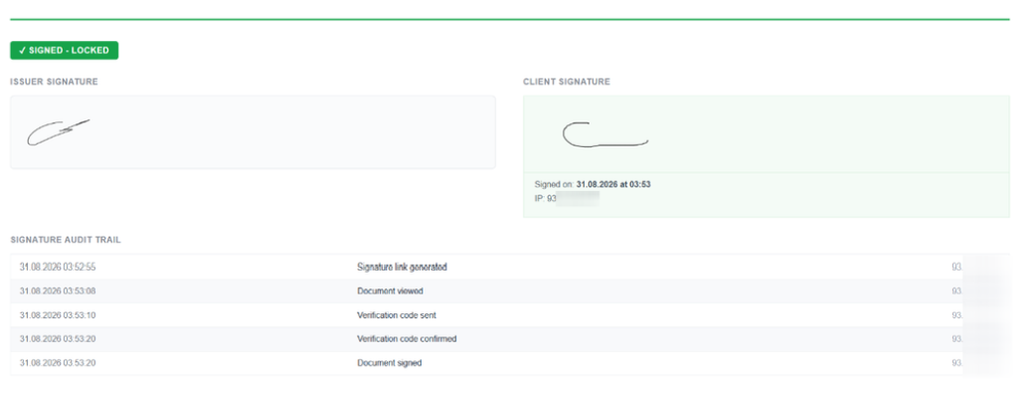
Every action on the document is recorded:

  • When the link was generated and sent
  • When the client first opened/viewed the document
  • When the verification code was sent and verified
  • Exact time, IP address, and device from which the document was signed
  • If the document was refused – when and (optionally) why
—

⚠️ Troubleshooting

The client is not receiving the verification code (OTP)?

  • Check if the client has a correctly entered email in their profile.
  • The code has a limited lifespan – if it expires, the client can request a new code. The document cannot be edited?

Dokument se ne može uređivati?

This is expected behavior after a document is signed – signed documents are permanently locked for legal security. If a change is truly necessary, create a new document (e.g., a new invoice).

I don’t see the e-signature option on the invoice?

Check if you enabled the “Enable e-signature” option while creating/editing that specific document – the function is enabled individually per document, not globally.

Updated on August 31, 2026

Kako vam je pomogao ovaj članak?

How to Set Up e-Invoices

Leave a Reply Cancel reply

Your email address will not be published. Required fields are marked *

Start your free trial today!

Don’t wait! Start invoicing in just a few minutes and optimize your business.

Try for free
Facebook-f Instagram Youtube Jki-open-book-light
Company
  • Prices
  • About Us
  • My AdBooks Account
  • Blog
  • Knowledge Base
Legal Notices
  • Impressum
  • Terms and Conditions
  • Privacy Policy
  • Contact Us
Languages
  • English
  • Deutsch
  • Bosanski
  • Français
  • Slovenščina
Knowledge Base
  • EN Help
  • DE Hilfe
  • BA Pomoć
  • FR Aide
  • Sl Pomoč
AdBooks Knowledge Base

AdBooks Knowledge Base is your source for all information about our application. Find guides, tutorials, and answers to frequently asked questions in 5 languages: English, German, Bosnian, French, and Slovenian. The knowledge base is here to help you make the most of AdBooks’ features and improve your business.

© AdBooks. All rights reserved.